Showing posts with label Bolt Action. Show all posts

Saturday, 4 May 2013

Mbogo's a go-go!

I found a few hours here and there this week to get the Mbogo ball rolling. I've cleaned up and undercoated all the East Mbogo regulars and finished the first squad.

Fire team A. NCO, 2 rifles and SAW.


Fire team B. 3 rifles and LAW.


All together...

 
I've assembled a little support for them in the form of an M48 tank and a V100 Commando armoured car. Their attack copter is still unassembled.
 
I'm thinking Mbogo will launch in June. I've done a little map work and a lot of background / history. The E. Mbogo army list is half written in the same format as the lists in the Bolt Action book. Oh yeah, the first two scenarios are written too!

Monday, 29 April 2013

Club Night 19th April - Bolt Action: Hold Until Relieved III

Turn 5

The Dingo continued to pile the hurt onto the squad pinned just in front of it (aided by the mortar)while the nearby Pz IVH carried on ignoring it.


The 222 was performing a similar trick against the poor remnants of a British section...


The real drama started on the German right as a long range 'schreck shot lit up a Sherman; the Ronson rule guaranteeing it's distruction.


The Firefly took more pins from the opposing panzer effectively taking it out of the game


Turn 6

Boom! The right flank Sherman was set on fire and went 'all inferno' (Ronson!) thanks to the continuing efforts of the Pz IVH. In the graveyard the pinned Brits failed to make their dash to the objective. Not so the German platoon HQ who sneaked up to claim it, using it as cover.


The central Pz IVH rolled up and the German MMG went into ambush covering the road.


Oblivious to the now ineffectual Firefly the right flank Pz IVH moved to cover the objective as the 'schreck team eyed up the British mortar position.


If the game had ended now the Germans would have won, but no, the dice gods said play on.

Turn 7 (Final Turn)

There was no way the German HQ could be winkled out of their position behind the bunker so the only hope for the Brits was to contest the objective for a draw.


The graveyard section refused to move again, (probably saving their lives) so it was down to the fresh section that had moved in from the left flank. If they took the shortest route they would be Advancing (6") through a hedge and would fall short. However, Matt had correctly eyeballed the distance and was planning on Running (12") around the hedge to reach the objective but alas, the next order die was German... This allowed Keith to display the low, underhand, gamey sort of cunning that makes him ideal to play the 'vile Hun'.

He drove a Pz IVH up to the hedge and parked with his 'bumper' against it. The Brits now had to go around the tank and could no longer reach the objective!


 Game over. German victory!


Thus ended our biggest and best game of Bolt Action yet. We all enjoyed it and (at least up to turn 6...) felt like realistic tactics were used and rewarded. A club noobie who joined in liked it so much he invested in a whole 20mm WWII army at Salute the next weekend!

Several of us, me included, expressed disatisfaction with the Recce rule. I know I've seen it slated on a few forums. The ability to repeatedly escape from fire encourages unrealistic offensive action. House rules incoming...

Club Night 19th April - Bolt Action: Hold Until Relieved II

Turn 3

The British pushed forward aggressively on their right flank trying to move into the graveyard which would make an excellent jump off point for taking the objective. A Sherman moved into the cover of the wall to trade potshots with the Pz IVH opposite. The Germans were content to hold the hedge line along the road and exchange shots.


The British were also the main players on the other flank. The section that had been cowering behind the house started to move towards the centre and a Sherman along with the PIAT team moved into a forward position. The German Panzerschreck team arrived and moved up their right flank covering the Pz IVH that was sitting there engaging the second Sherman and Firefly.


Turn 4
 
The British surged into the graveyard and the Sherman accompanying them continued to unsuccessfully engage the Pz IVH, taking a couple of pins. The cheeky Sdkfz 222 moved up again putting a few rounds into the troops that hadn't made the cover of the walls.


Shortly after, a third Pz IVH arrived which took up a position covering the objective, totally ignoring the Dingo that was taking point blank shots at the infantry nearby, (knowing that it could simply 'recce away'.)


The Pz IVH on the German right managed to put a pin on the Firefly and the 'schreck team continued their wide sweep


Part III will relate the final three turns. Maybe later tonight, maybe not...

Wednesday, 17 April 2013

Club Night 12th April - Bolt Action: Hold Until Relieved

After painting up the new vehicles I was itching to get them into a game. Our three previous games of Bolt Action were a larger British regular force against a smaller veteran German group but because I'd mainly painted Germans the British were now seriously 'outpointed'.

So for our fourth game the situation was reversed, British vets. against German regulars (mostly old men and boys. This allowed me to squeeze in all my new toys - our biggest game yet.

Scenario: Hold Until Relieved

Germans (Keith and John)
1703 pts
British (Barry and Matt)
1703 pts
HQ HQ
Regular Veteran
Sdkfz 250/1 AFO
Regular Regular
Squad 1 Squad 1
Regular Veteran
Squad 2 Squad 2
Regular Veteran
Squad 3 Squad 3
Regular Veteran
MMG 1 MMG
Regular Veteran
MMG 2 Medium Mortar
Regular Veteran
PzSchreck Firefly
Regular Veteran
PzIVH Sherman 75mm
Regular Veteran
PzIVH Sherman 75mm
Regular Veteran
PzIVH PIAT
Regular Veteran
75mm Pak 40 Dingo A/C
Regular Veteran
Maultier
Regular
Sdkfz 222
Regular

Deployment

The Germans set up one squad in a walled graveyard near to the bunker objective and a MMG in the first floor of a building overlooking the bunker. The British then deployed their infantry on three sides of the Germans, only leaving the route to their baseline open.

Turn 1

The British opened the turn by firing their mortar at the graveyard squad; 6! Half the squad dead...
It was the Germans however making all the moves as their 1st wave came on. Taking advantage of the Brits' temporary dearth of AT capability the Sdkfz 222 cheekily rolled up to point blank range and riddle a squad on the British right, causing a couple of fatalities. The squad weighed up the chances of a successful assault and fled around the corner of a hedge instead. A Pz IV arrived on the German right.

Photos from the end of turn 1. Two whole table shots (6' x 7'); first from British left, second from the right.


The British left flank cowering behind a house.


German 1st wave arriving...

 
Turn 2
 
The Pz IV went into ambush and incredibly 10 of the first 11 dice pulled were German allowing a relentless advance across the whole front. They did fail a number of reserve roles however so the 'Schreck and the other Panzers were delayed. The 222 repeated it's point blank attacjk but only managed a pin, even with the help of the first floor MMG. Random chance had turned the game into IGoUGo and it was now the British turn!
 
All the British reserves arrived and one of the Shermans opened fire on the 222 but it retreated and hid (recce.). The Pz IV in ambush fired on a Sherman arriving on the opposite flank which returned fire, both missed. Lots of fire was poured into the graveyard but to no effect. This included a cheeky run by the Dingo trying to emulate the 222 but the hard cover of the walls resisted it's efforts.
 
End of turn 2. The Germans advance...
 

Unless they're hiding...


Whole table. Good luck spotting the differences...


The Sherman that saw off the Sdkfz 222 and infantry attacking the graveyard.


The cheeky Dingo.


Pak 40 moves into position.


Setting up took a lot of time and it was now 11 p.m. (we talk a LOT) so we called it a night. We'll finish this Friday. Watch this space.


Saturday, 6 April 2013

Bolt Action Progress II

A final push on the painting yesterday, followed by basing this morning means the next batch of 1/72 WWII goodies are ready to present to the world. They're a little darker than I wanted but not as dark as the photo's suggest. These should see their first game of Bolt Action next Friday so look forward to a battle report...

Pz IVH platoon - camo. based on a Google search but absent the green on yellow spots that I put on my Stug IIIG's.


Recce: Sdkfz 250 and Sdkfz 222 - camo. copied from my prepainted Jagdpanther.


The Pak 40 finally gets a tow; a Maultier halftrack. I went for a '2 men were given 2 paint tins, 2 brushes and 10 minutes' look to the camo. as it wouldn't normally be factory applied on softskins. You can see how the Model Colour US Drab (Maultier) is a great match for GW Graveyard Earth (gun and crew) on the bases, as mentioned in my previous post. I wish I could remember how I did the yellow on the gun...


Finally, the Daimler Dingo recce armoured car. How long will he live on Friday?


I remember reading a quote from a soldier in a British recce. squadron based in W. Germany in the 80's. He basically said that if the Cold War went hot it would be his job to mount up and go locate the Warsaw Pact troops and that from that time his life expectancy was estimated at 10 minutes. Grim.

In the next week I should get some more Wars of the Roses stuff painted and my first game of Armies of Arcana in, so lots coming to this blog soon.

Wednesday, 3 April 2013

A Basing We Will Go...

Until recently I was using GW Graveyard Earth for all my basing but then they stopped making it. Bugger. (This is the second time they've stitched me up; I'm not commiting to their new range).

I managed to scout out half a dozen pots* for matching in with old projects but I needed something similar for new projects. After all, my whole table is based on this scheme.


At WMMS a few weeks ago I scouted through all the different paint ranges that were available. Research had told me I should be looking at Game Colour 72062 Earth but on closer inspection Model Colour 70873 US Field Drab was a much better match. There was an amusing situation where I was 'stopped for shoplifting' as I put my GW sample back in my bag. Soon explained away...

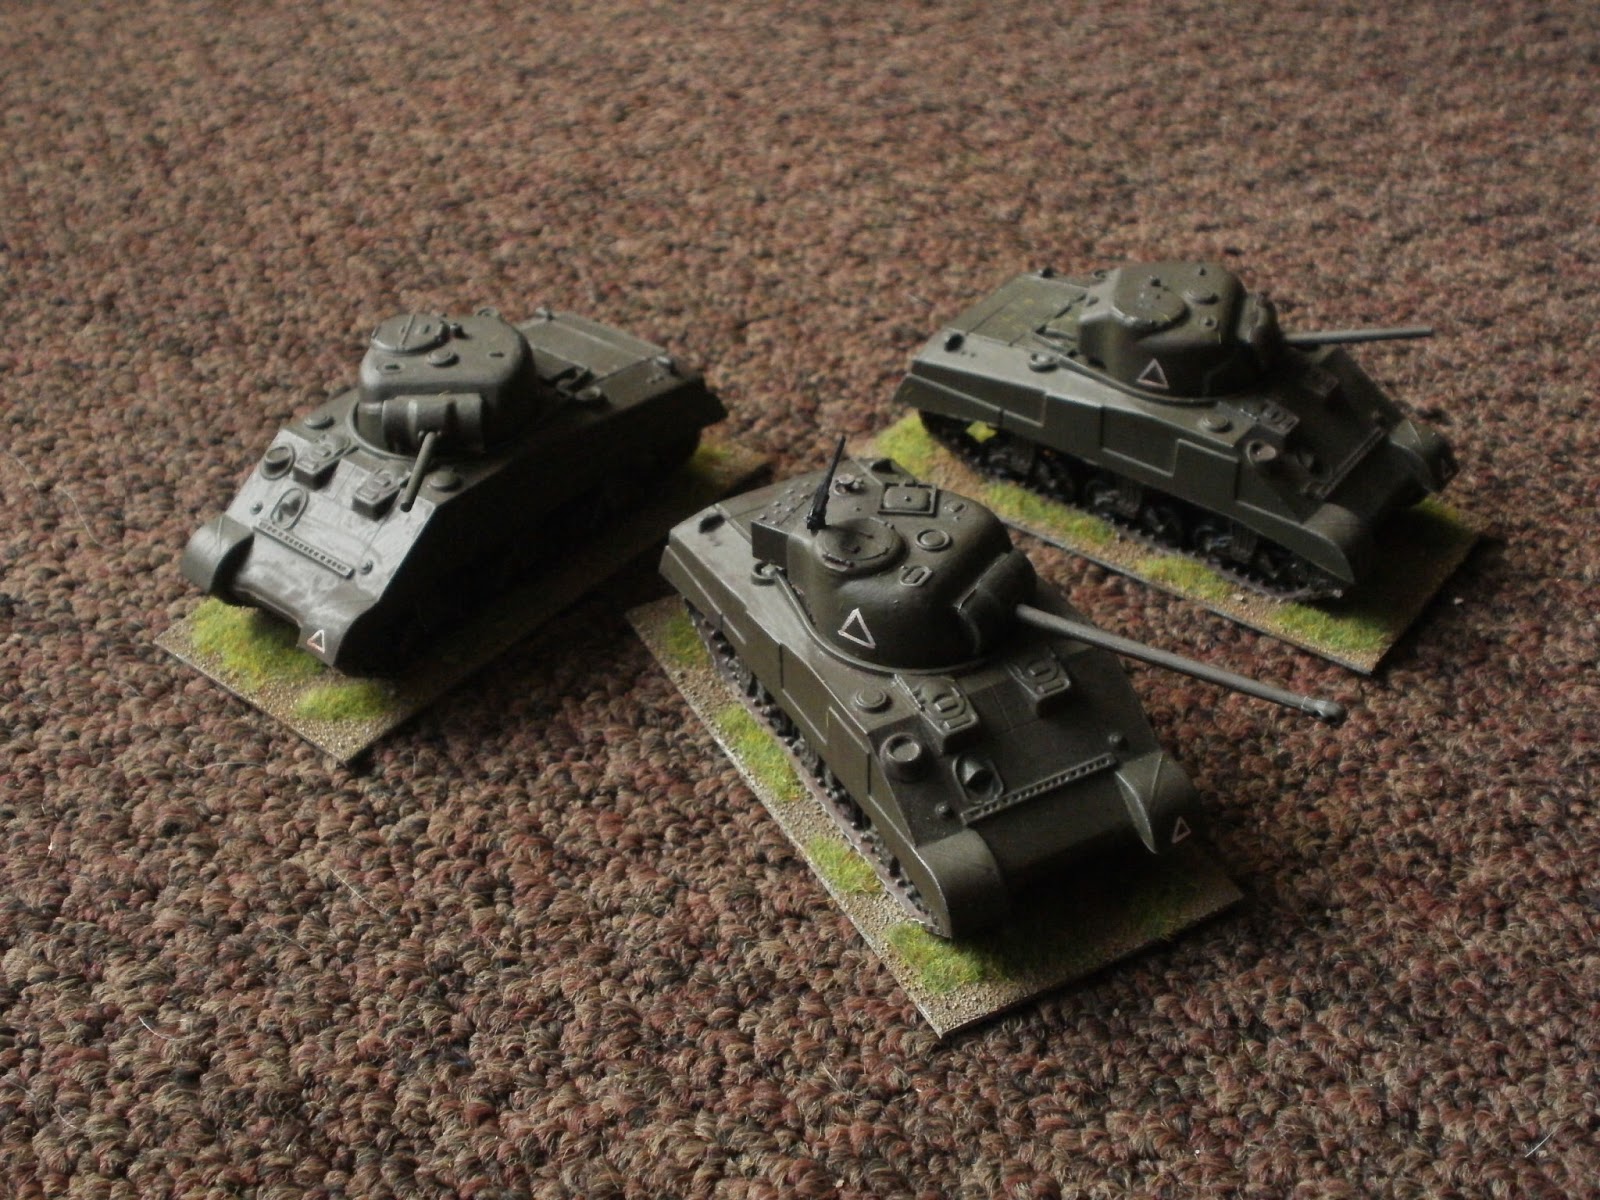
The Stone Golems were the first thing based with my new discovery and yesterday I based a few of my older Bolt Action 1/72 WWII tanks. I know basing vehicles is a matter of taste; I like the look either away. Based vehicles are just that little more robust in storage and less likely to sidescrape paint off each other.

Jagdpanther


 Sherman platoon inc. Firefly


Stug IIIG's


These aren't the only things I've based today. More tomorrow...

*and 20 pots of Ogryn Flesh Wash :)

Sunday, 17 March 2013

Bolt Action Progress

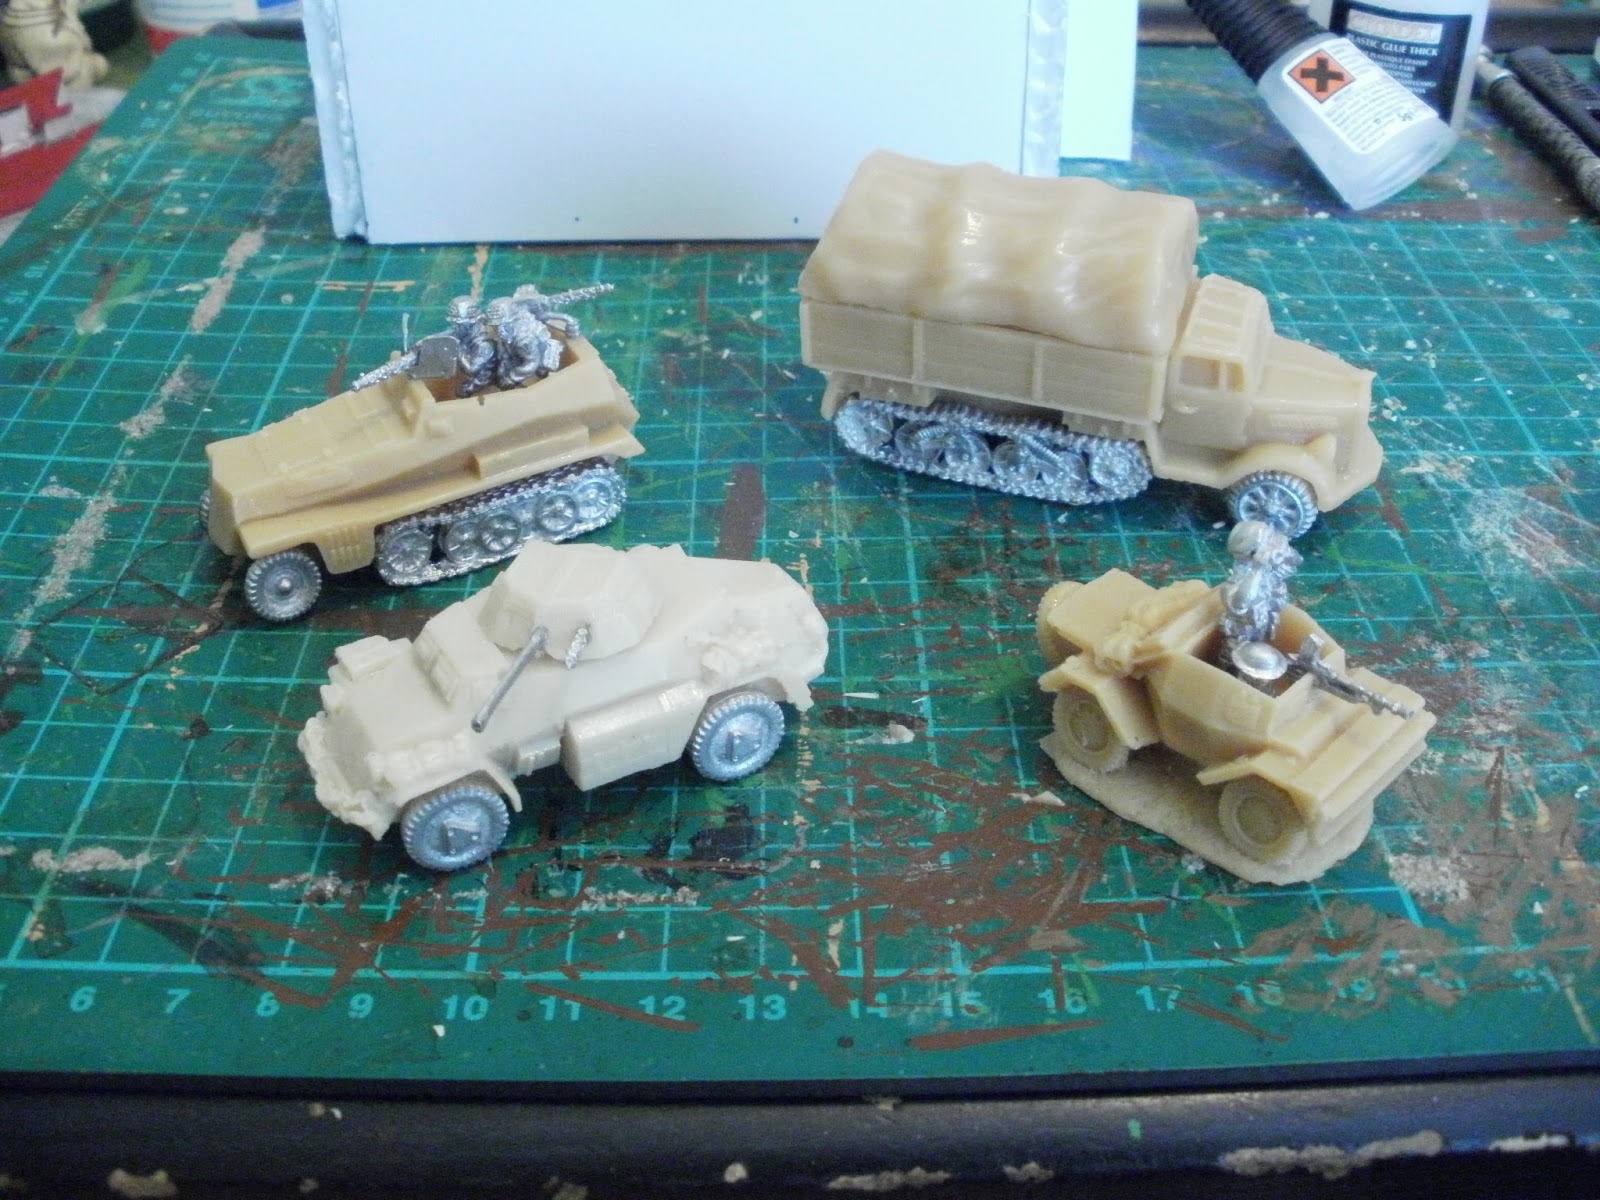
The Britannia Miniatures order that I mentioned a few weeks ago has finally been assembled ready for painting. Resin and metal is a pain in the arse compared to plastic but they went together well enough. The Germans are getting a Maultier to tow the Pak 40, a recce. Sdkfz 222 AC and a recce. Sdkfz 250. Once I've bought a box of PSC Sdkfz 251D's the 250 will carry a platoon HQ. The British lost out and only got a Daimler Dingo AC. Still, it's cute...


And this is why I've only just assembled the resin stuff, I wanted to paint them at the same time as these beauties. A platoon of Pz IVH's from PSC. The models go together really well; they're quality figures. The instructions were crap however, as is the norm for PSC unfortunately.

Saturday, 2 February 2013

Club Night 1st February - Bolt Action

Three weeks in the planning, we finally managed our Bolt Action game at the club yesterday (Stoke Wargames Group). I left all my Last Valley bocage and trees at home by mistake so we moved the action to somewhere in Italy...

OOB's

Germans; Sean and Keith (Veterans):
PHQ
3 squads
2 MMG's
1 PzSchrk team
1 Pak 40
1 JgdPanther

British; Barry and Jim (Regular):
PHQ
1 FAO
3 squads
1 MMG
1 medium mortar
1 PIAT team
1 Firefly
2 Shermans

Both the British and the German defenders put as many troops as possible into Reserve. The Germans wanted to avoid the Preparatory Bombardment and to be able to rapidly deploy to hotspots; the British planned to send their Shermans on deep outflanking moves as usual...

German Deployment and Turn 1

 
The Germans deployed one MMG in the bunker in front of the southern objective, the JagdPanther and Pak 40 in front of the central objective and one squad with the PHQ in the building complex covering the most northern objective.

Someone FUBAR'd and the Preparatory Bombardment never came! The first wave of British came on in fine style over the whole front; the PHQ and FAO, all 3 squads, the mortar/spotter and the MMG.


Turns 2 and 3

As all the tanks were outflanking the only British Reserve unit to come on was the PIAT.  They advanced aggressively in the south but seemed to forget there was objectives to be accomplished in the north. The mortar spotter moved into the eastern-most building and started to look for likely targets.

The Germans waited until turn 3 to start their Reserve rolls to see how the action was developing. This led to the first shots being exchanged in the south between opposing infantry squads; the Germans coming off slightly worse.


Turn 4

The Firefly burst on to the scene in the south and wasted an awful lot of bullets on the nearest German squad to no effect (other than another Pin marker). The mortar spotter radioed in the location of the Pak 40 and it disappeared in a cloud of smoke; all four crew killed with the first shot.

The German MMG in the bunker opened up on a British squad emerging from behind the church, pinning them; they didn't manage to move again.

A German Reserve squad in the north took a burst from the British MMG who skillfully picked out the MG42 gunner at almost maximum range.


 Turn 5

The first regular Sherman arrived in the north, and also demonstrated the inadequacies of British MG training. The mortar spotter worked his magic again and his buddies annihilated a freshly arrived German MMG with their next shot.

The bunker MMG kept the squad in front pinned but another squad outside of its arc of fire continued to advance agressively. The JagdPanther brashly emerged from cover, driving into the river to take a shot at the flank of the Firefly... missing.

Turn 6

The Sherman in the north took the nearest objective as it's twin arrived in support. In the south the Firefly eliminated the JagdPanther in fine style. AT weapons were fired left, right and centre to no effect by both sides. By the end of the turn the Germans had very little left that could hurt a Sherman but were still holding two objectives and therefore winning... At this point the FAO (who had done sweet FA) came out of his coma and coordinated a barrage for... Turn 7. If there wasn't a Turn 7 then it would never come and the Germans would have won. 1-3 game ends, 4-6 play another turn...

Turn 7

As the bunker was assaulted, destroying the last German MMG, the Firefly took the southern objective claiming a draw; there was no way of getting to the central objective so surely that was it? No, we remembered the barrage and decided to resolve it before calling the game. FUBAR! The barrage scattered onto the Sherman holding the northern objective, if it could be destroyed then the Germans could rush the objective and win. The dice gods decided to let the Sherman off with a couple of pin markers however and the game was drawn.

Three games in now and everyone still LOVES Bolt Action! More soon...

(More piccies from no particular turn...)